DIY: Recycled CD Art (Nature Inspired)
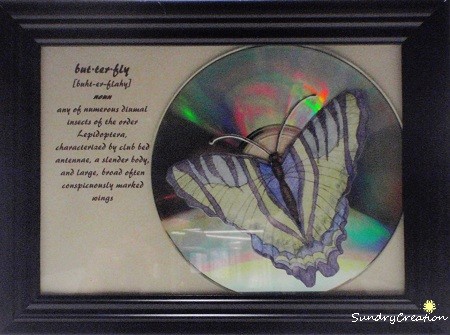
When cleaning out my office this past week I came across a lot of old computer program and software CDs. Instead of throwing these CDs away, I decided that I would use them in some type of art project. Here are the finished pieces:


If you would like to know how I created these simple, nature inspired pieces of art just keep reading!
MATERIALS: old CDs, die-cuts or images of your liking, scrapbook paper, some type of spray adhesive or bonding glue, scissors, pencil, picture frame, and printer
Step 1: Using the backing of the picture frame as an outline, trace dimensions onto scrapbook paper and cut out
Step 2: Play around with the layout of CD and die-cut or image on scrapbook paper to determine placement for typed text
Step 3: Using MS word, I made the document size the size of the scrapbook paper outline from picture frame backing
Step 4: Type the text you want printed and align to the side that works best with your CD and die-cut or image placement
Step 5: Printed text onto the scrapbook paper
Step 6: Take scrapbook paper and glue paper to frame backing (text side up of course)
Step 7: Now glue CD (label side down) onto scrapbook paper in blank space next to text
Step 8: Remove finger prints from CD with cloth or paper towel and glue die-cut or image on top of CD (you can play around with the placement of the die-cut or image but make sure that it’s on the CD and doesn’t cover the text)
Step 9: Place frame backing back into picture frame
Voila! You have just created your every own one of a kind recycled CD art. Just repeat the above steps for the other pieces if you are creating a trio like mine.
Until next time, allow inspiration to find you!

