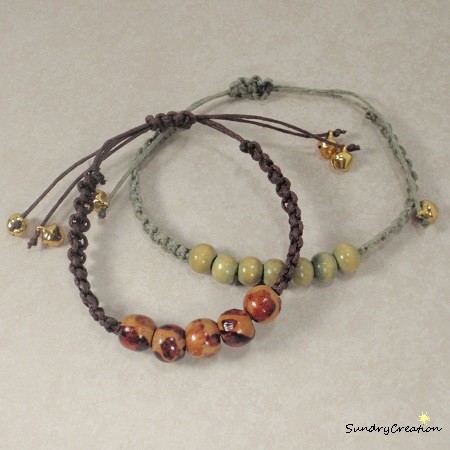
DIY: Adjustable Friendship Bracelet
So lately the trending thing seems to be friendship bracelets. I've tried dabbling my hand in this and decided I would share my experience with you.
I got this inspiration from YouTuber Anneorshine. The video that inspired the above creations was her DIY multi-chain friendship stacked bracelet video. Of course, I had to put my own spin on the project so instead of using chains I decided to use wooden beads.

Materials needed for this project include: wooden beads of your liking, colored cords/hemp, jingle clapper bell beads, measuring tape, scissors and super glue
INSTRUCTIONS
1) Cut three 20" cords and one 7" cord from colored cord or hemp cord
2) Take one 20" cord and string on wooden beads (use enough beads to measure 2" across)
3) Make sure beads are centered on cord by folding cord in half
4) Take one side of folded cord and take one 20" cord and tie 24 square knots below centered beads
5) Once square knots have been created flip cord to wrong side and tie a regular knot, secure knot in place with a dab of super glue
6) Once glue is dry snip off extra cord
7) Repeat steps 4-6 on the other side of folded cord with the centered beads
8) Add 1 jingle clapper bell bead to each end of the cord and tie a regular knot 3" down from the bracelet, secure knot in place with a dab of super glue
9) Once glue is dry snip off any extra cord
To Make the Adjustment Piece ~
1) Fold the ends of the bracelet together so that the ends of the cords cross and closed point is centered
2) Take the 7" cord and center it underneath the two cords under the center
3) Make 5-7 square knots
4) At the last square knot tie a regular knot, glue it, then cut off the extra cord when glue is dry
Now you're finished. Enjoy your new bracelet.
Until next time, allow inspiration to find you!

