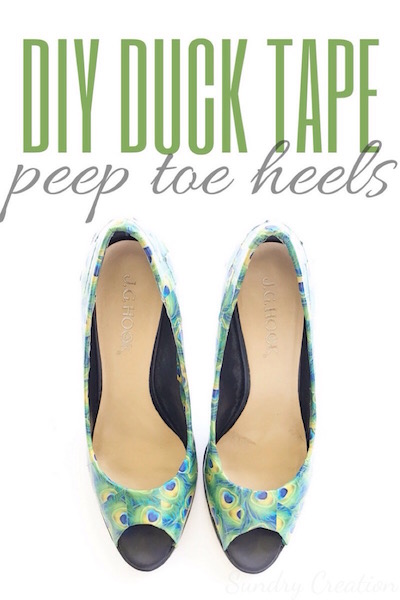
DIY: Duck Tape Peep Toe Heels
I don't consider myself to be a person who is hard on their shoes but when I find a pair that's comfortable to wear I have to admit that I will wear them until the soles fall off. Fortunately for my navy peep toe heels this wasn't the case. The leather upper part of the shoe was what started wasting away on me (insert violin music here). So not wanting to throw the heels away because I just knew that one day I would find a remedy for this and what do you know, I finally did which is what I will be sharing with you today. If you would like to know how to make a similar pair of these beautiful heels that you see depicted, just continue reading.
MATERIALS
(4) sheets of 8.25" x 10" duck tape sheets (used peacock feather pattern), scissors/paper trimmer, X-acto knife and a pair of worn out heels
STEPS
STEP 1: Cut duck tape sheet into strips using the grid located on the back. I used four grids across for each strip which equated to five strips per duck tape sheet. See image below.
STEP 2: Cut the strips into smaller manageable pieces. I used three grids down for each strip which equated to 30 pieces total. See images below.
STEP 3: Make sure heels are clean and free of any debris (dirt, dust, etc). Starting from the toe of the heel begin applying pieces of the duck tape to the shoe. Make sure you smooth out the duck tape as you go and work your way up the heel.
ASIDE: When applying the duck tape to the shoe work from the sole to the top and fold any excess duck tape under the inside of the shoe. Applying the duck tape this way will eliminate the step of having to use the X-acto knife at the end to remove the tape from the shoe sole. See image below.
STEP 4: For the rounded part of the shoe at the toe, cut slits into the duck tape so that it can be folded under the inside of the shoe neatly. See images below.
STEP 5: Continue adding pieces of duck tape along the length of the heel. Make sure the duck tape is pulled tight so it conforms to the heel without bubbles. Smooth as you go. For any remaining duck tape simply fold over the edge of the heel. Remember to apply the duck tape at the top of the sole first then work your way to the top of the heel. If you happen to have a piece of duck tape that overhangs on the sole as pictured below use your X-acto knife to carefully remove it using the top of the sole as a guide.
ASIDE: I alternated from side to side to make sure everything was even and also overlapped the tape a bit for added texture.
STEP 6: Repeat steps 3-5 for the remaining shoe and when done you should have a transformed pair of heels similar to the ones below.
Until next time, let inspiration find you!


